// Include the CapacitiveSensor library to detect touch
#include CapacitiveSensor.h
// Include the Servo library to control a servo motor
#include Servo.h
// The code below for capacitive sensor and servo motor was taken from Paul Badger
// and Scott Fitzgerald through the Arduino examples, and then modified for my
// own purpose to combine the two functions!
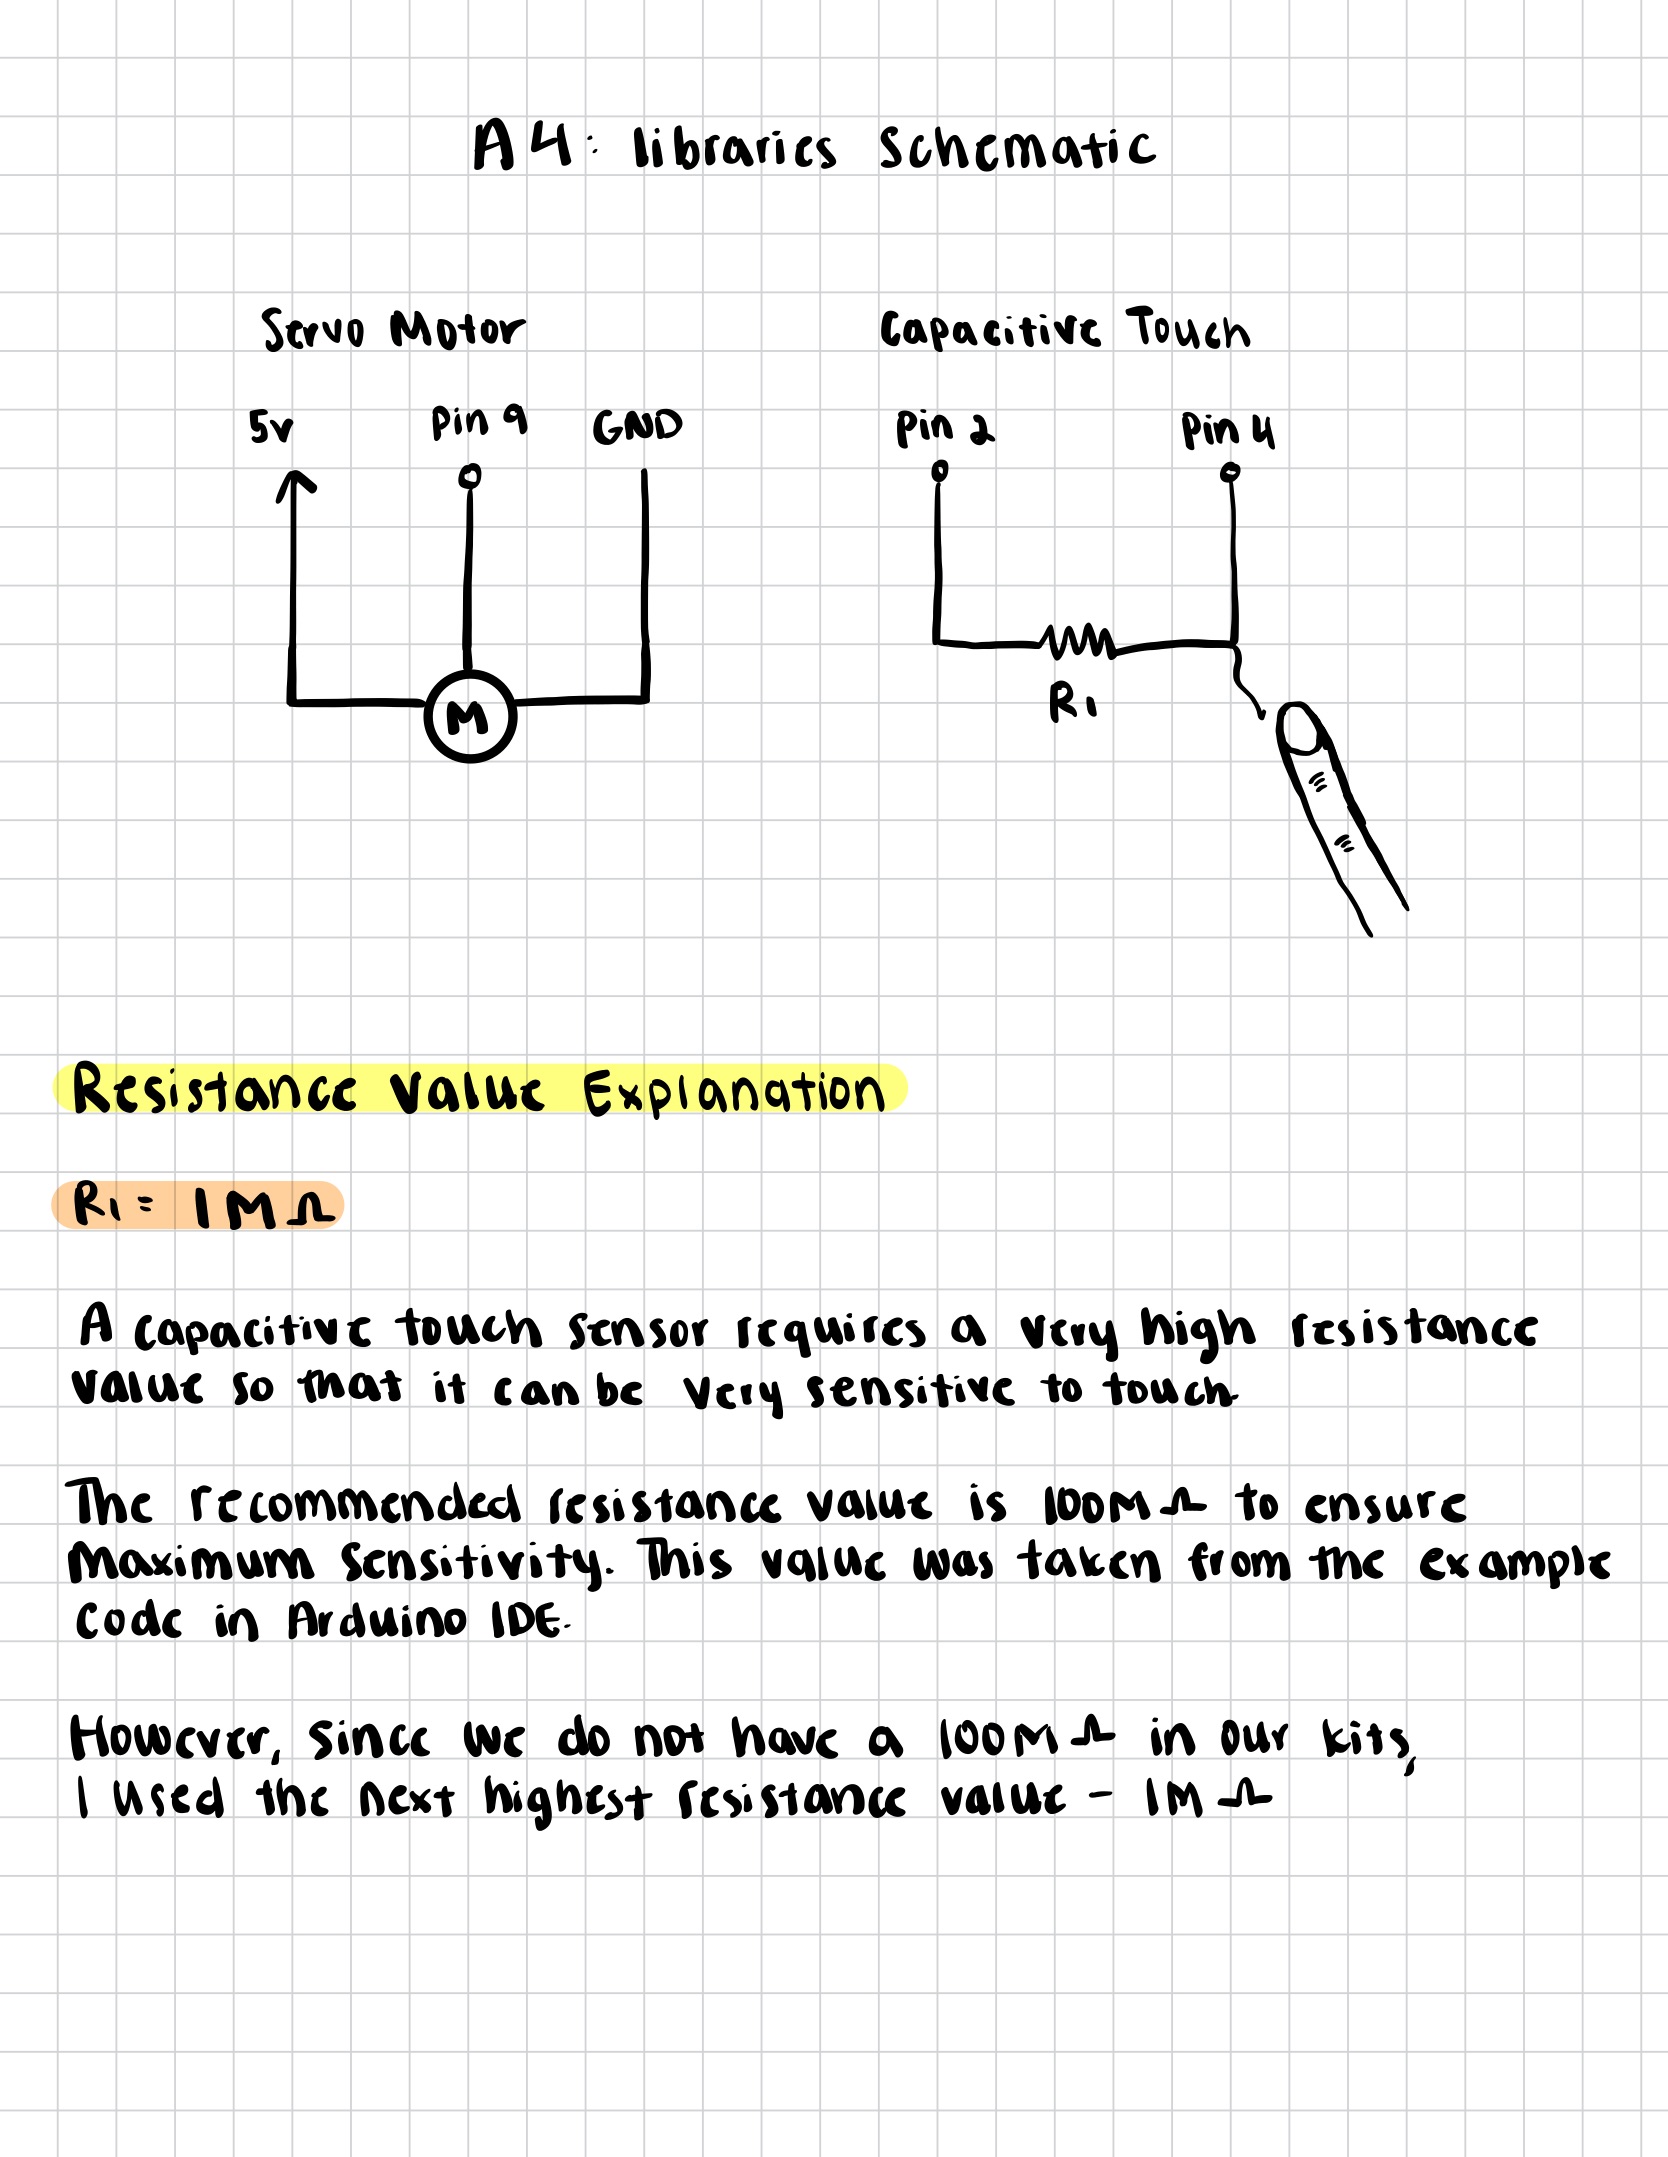
// Create a CapacitiveSensor object named "cs_4_2".
// The first number (4) is the "send" pin.
// The second number (2) is the "receive" pin.
CapacitiveSensor cs_4_2 = CapacitiveSensor(4, 2);
// Create a Servo object named "myservo" so we can control it in the code
Servo myservo;
// Create an integer variable "pos" that will hold the current angle
// of the servo (0–180°)
int pos = 0;
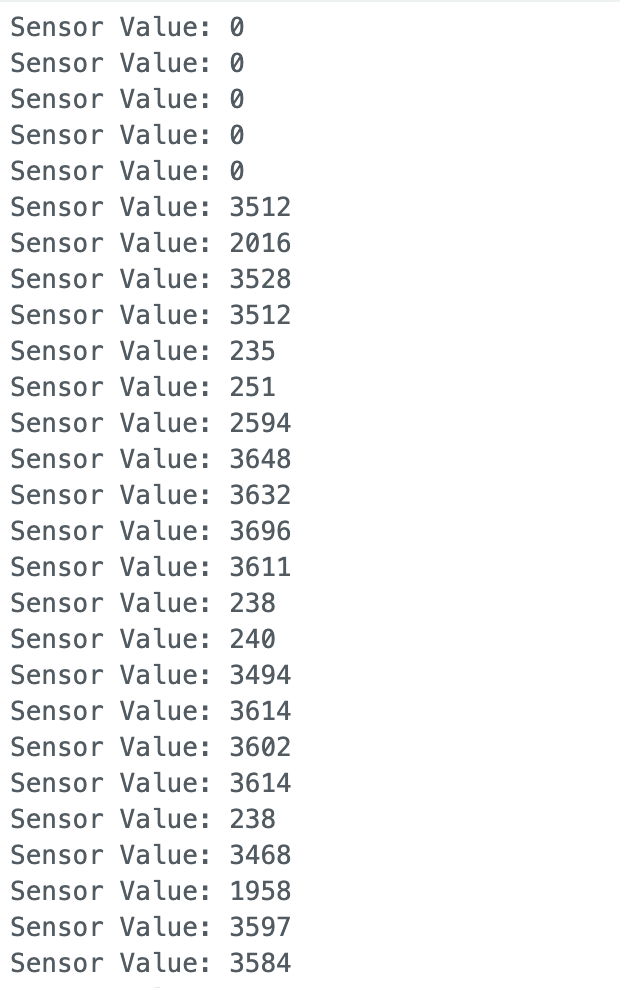
// Define a threshold that determines what counts as a "touch".
// Based on the readings in my Serial Monitor, my conductivity
// level reads about ~2k - 3k.
// With nothing touching the sensor, it reads about ~200.
// Therefore, I am defining this threshold to be 1k, so that when
// my finger touches it will be sure to make the motor move faster
long touchThreshold = 1000;
// Define two different delay times to control how fast the servo moves.
// "slowSpeed" = delay (in ms) between servo position steps when untouched.
// "fastSpeed" = delay (in ms) between steps when touched.
int slowSpeed = 20;
int fastSpeed = 5;
void setup() {
// Start the Serial Monitor to display sensor value readings.
Serial.begin(9600);
// Attach the servo’s control wire to Arduino pin 9.
// This allows the Servo library to send position signals to that pin.
myservo.attach(9);
// disable auto-calibration of the capacitive sensor.
// When auto-calibration is off, the sensor’s baseline remains fixed,
// which can make behavior more stable.
cs_4_2.set_CS_AutocaL_Millis(0xFFFFFFFF);
}
// main loop
void loop() {
// 1. Read capacitive sensor value
// This measures the capacitance on the sensor pad by sending 30 pulses.
// The result is a number: higher means more capacitance (a finger touch).
// ** ChatGPT helped me understand what this line of code does!
long sensorValue = cs_4_2.capacitiveSensor(30);
// 2. Print the sensor reading to the Serial Monitor
Serial.print("Sensor Value: ");
Serial.println(sensorValue);
// 3. Decide how fast the servo should move through a variable, delayTime, that
// holds the current speed setting.
int delayTime = 0;
// If the measured capacitance is above the threshold,
// that means the pad is being touched.
if (sensorValue > touchThreshold) {
delayTime = fastSpeed; // move the servo faster
} else {
delayTime = slowSpeed; // move the servo slower
}
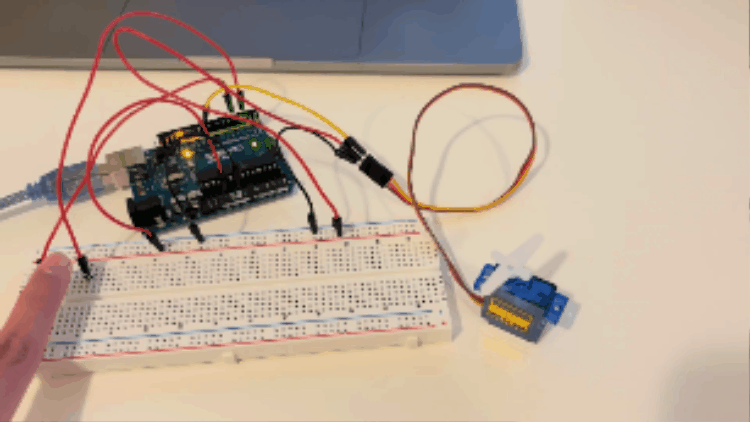
// 4. Sweep the servo back and forth between 0° and 180°
// This part is very similar to Scott Fitzgerald's example
// of 'sweep' for a servo motor. However, I replaced the delay
// time with my own values so that the motor speeds up or
// slows down according to the capacitor.
// Move from 0° up to 180° one degree at a time.
for (pos = 0; pos <= 180; pos++) {
myservo.write(pos); // Tell the servo to move to the "pos" angle
delay(delayTime); // Pause briefly before moving to the next degree
}
// move back from 180° down to 0° one degree at a time.
for (pos = 180; pos >= 0; pos--) {
myservo.write(pos); // Tell the servo to move to the "pos" angle
delay(delayTime); // Use the same delay time for this direction
}
// After this, the loop starts over and repeats forever.
}